.webp)

How to automatically generate children's stories with AI
Welcome to the era of content automation! Imagine being able to quickly register a compilation form, and shortly after receiving a complete story, enriched by a cover image, ready to share with the world. This is exactly what the following Make scenario offers. Through a series of well-coordinated steps, this workflow simplifies the creation of personalized content and its distribution, freeing you from the tedious search for illustrations and the trouble of manually assembling every part of your story.

Let me introduce you to this workflow designed for:
- Registration Of A Compilation Form
- Creation of a story (or any type of content based on a completed form)
- Generation Of a cover image for the story
- Salvage In a document
- Sending Of an email with the attached document
With this workflow, you'll reduce the time you spend creating personalized content and searching for illustrations that match the content.
This scenario can make a difference if you work in:
- Content Marketing
- Storytelling
- Communication
Ready to streamline your process of creating children's stories? Read on to learn how to save valuable time and focus on more strategic activities.
Step 1: Prerequisites
Before you begin, make sure you have the following prerequisites:
- An Account on Make
- A connection to Fillout
- An OpenAI subscription with access to the GPT-4 model
- A Gmail connection
Step 2: Configuring the Workflow
The workflow includes 1 trigger, 8 actions, 1 Flow Control.
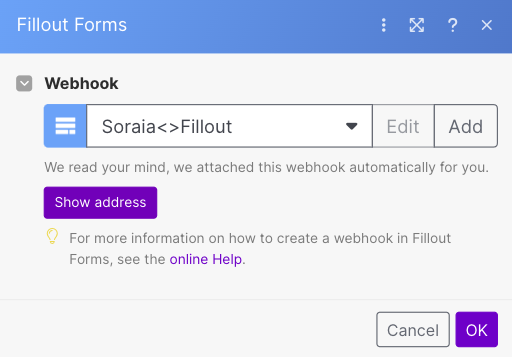
1. Fillout Forms- Whatch New Responses
This webhook as a trigger for the workflow so that the Make scenario is launched.
2. Generate Story- Create a completion
At this stage, we need to select an OpenAI model for storytelling, with GPT-3.5 being an appropriate choice for this specific scenario.
Now is the time to demonstrate our expertise in prompt engineering, establishing specific contexts and roles to allow GPT to meet our needs.
In this scenario, there are two distinct roles:
- Role of the System: It provides the general context and background.
- Role of the User: It provides specific guidance and guidelines.
Each role has two associated types of message content:
- For the Role of the System: Tell the AI to act like the 'X' role.
- For the User: It asks the AI to analyze 'A', and to provide 'B' with the 'C' format.
This approach allows you to customize the structure, tone, and content of the story based on individual preferences and specifications.
If you would like to learn more about the difference between the two roles, I invite you to consult the documentation: Chat Completions API documentation.
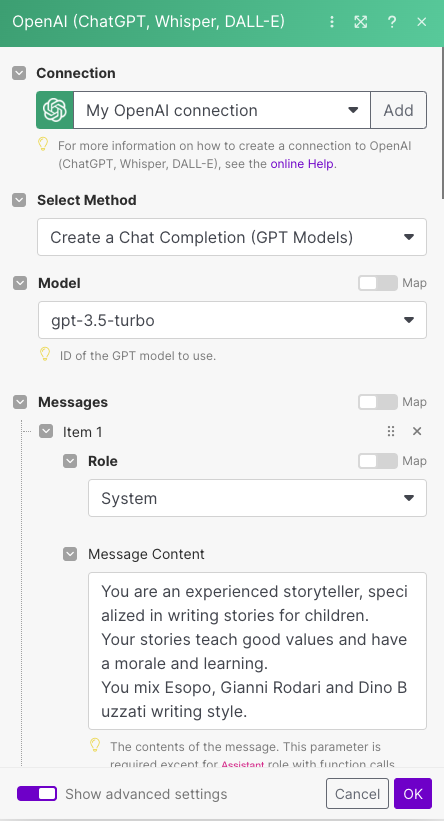
In this workflow, we will use the piece of information received from Fillout (light blue fields).
You can also set the format you expect with a key-value structure:
{
"story_title": "The title of the story",
"chapter1_title": "Title for chapter 1",
"chapter1_content": "Content for chapter 1",
"chapter2_title": "Title for chapter 2",
"chapter2_content": "Content for chapter 2",
"chapter3_title": "Title for chapter 3",
"chapter3_content": "Content for chapter 3",
"chapter4_title": "Title for chapter 4",
"chapter4_content": "Content for chapter 4",
"chapter5_title": "Title for chapter 5",
"chapter5_content": "Content for chapter 5"
"the_end":"The End."
}
And also the tone of the voice, as well as a happy or sad ending:
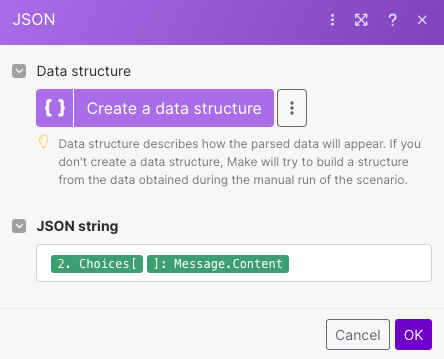
3. JSON- Parse JSON
Create a JSON data structure and use the information collected in the previous step 2. Generate Story- Create a Completion
3.1 Ignore
This is a workaround in place to execute Error Handling in Make.

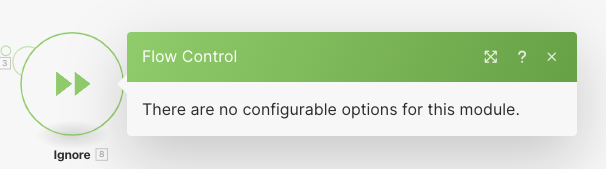
When making HTTP requests to external services, you may encounter runtime errors that cannot be controlled, since they depend on the third-party service. Without an error handler, the entire scenario could break down in case of errors.
The use of an error handler is essential to handle any errors generated by the previous OpenAI chat completion action. In the event of an error, this allows you to skip the next steps in the workflow. However, if the error does not occur, the flow can proceed without interruption with the next steps.
4. Generate Prompt- create a completion
In this scenario, there are two distinct roles:
- System: The prompt engineer who specializes in text-to-image prompts.
- User: The narrator who describes the image, the landscape and the setting to improve the image generation process.

Providing examples is a best practice to help OpenAI understand and produce a version that is as close as possible to what you want.

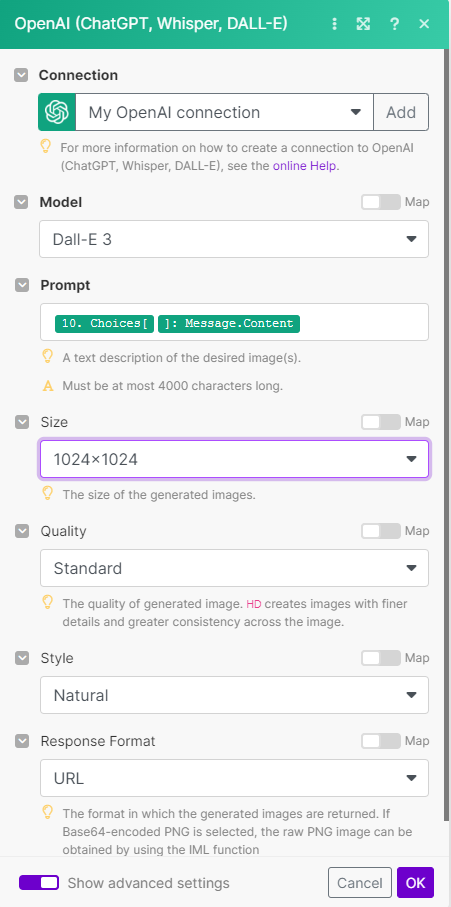
5. Generate Image
Use the OpenAI prompt to generate an image for the story thanks to DALL-E.
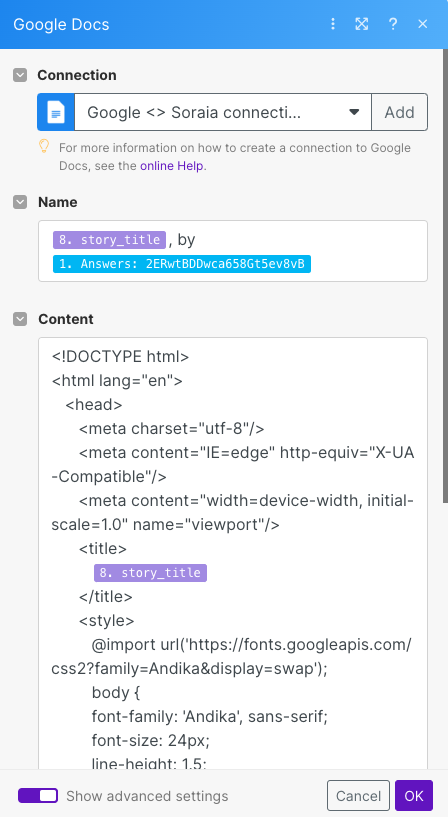
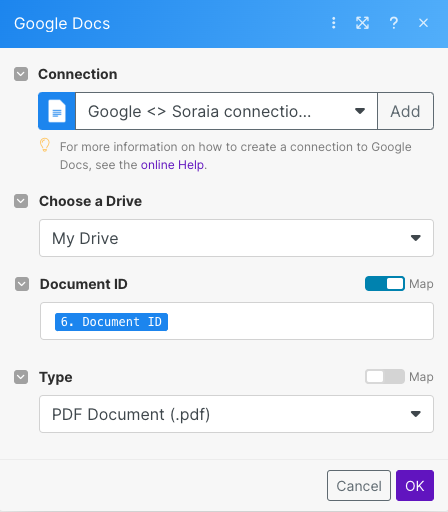
6. Create Google Docs- Create a document
Use the following template
<!DOCTYPE html>
<html lang="en">
<head>
<meta charset="utf-8"/>
<meta content="IE=edge" http-equiv="X-UA-Compatible"/>
<meta content="width=device-width, initial-scale=1.0" name="viewport"/>
<title>
{{8.story_title}}
</title>
<style>
@import url('https://fonts.googleapis.com/css2?family=Andika&display=swap');
body {
font-family: 'Andika', sans-serif;
font-size: 24px;
line-height: 1.5;
padding: 60px;
background-color: #FFF1E0;
color: #333;
}
h1 {
font-size: 36px;
text-align: center;
margin-bottom: 30px;
}
img.cover-image {
display: block;
margin-left: auto;
margin-right: auto;
margin-bottom: 50px;
}
h2 {
font-size: 30px;
margin-top: 40px;
margin-bottom: 20px;
}
</style>
</head>
<body>
<h1>{{8.story_title}}</h1>
<img alt="Immagine di Copertina" class="cover-image" src="data:image/png;base64,
{{15.result[].items[].image}}"
style="width: 674.50px; height: 674.50px; margin-left: 0.00px;
margin-top: 0.00px; transform: rotate(0.00rad) translateZ(0px);
-webkit-transform: rotate(0.00rad) translateZ(0px);"/>
<p>
<p>
<h2>
{{8.chapter1_title}}
</h2>
<p>
{{8.chapter1_content}}
</p>
<h2>
{{8.chapter2_title}}
</h2>
<p>
{{8.chapter2_content}}
</p>
<h2>
{{8.chapter3_title}}
</h2>
<p>
{{8.chapter3_content}}
</p>
<h2>
{{8.chapter4_title}}
</h2>
<p>
{{8.chapter4_content}}
</p>
<h2>
{{8.chapter5_title}}
</h2>
<p>
{{8.chapter5_content}}
</p>
<h2>
{{8.the_end}}
</
to generate a document using the information collected in the previous steps:
- JSON → purple fields
- Generated Image → blue fields
- Compilation Form → light blue fields
7. Google Docs- Download document
Download the document with a 'Specific ID' Specific
8. Markdown- Markdown to HTML
It generates a markdown, a format suitable for printing and displaying information. This will be converted to HTML and will constitute the body of the email to be sent in the next step.

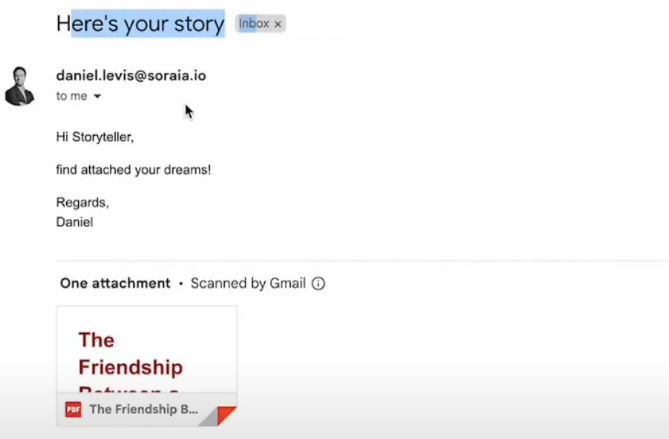
9. Gmail - Send an Email
Create an email message with the attached story as a document, using the previous HTML as the body of the message, and enter the recipient retrieved from the Compilation Form.

Step 3: Final Result
Et voilà
Don't forget to edit and review the content before submitting 👀
Congratulations, you've created your first AI-generated children's story 🚀
Do you want to follow an interactive tutorial step by step? Watch the Our tutorial On YouTube
Now you can save valuable time by focusing on more strategic activities.
Don't hesitate to explore our YouTube channel to implement other use cases and automations 🤖
Good automation!
Tools used